Canva is a highly regarded platform for non-designers (and sometimes designers!) who wish to create professional-looking designs for both the web and print. Many of our customers use Canva to create files for printing, so we’re here to offer this helpful guide to setting up your design files accordingly to print with GotPrint. We promise it’s easier than you’d think! Read all the steps below to get the process started.
1. Head to our Download Templates page and select the product you plan to print.
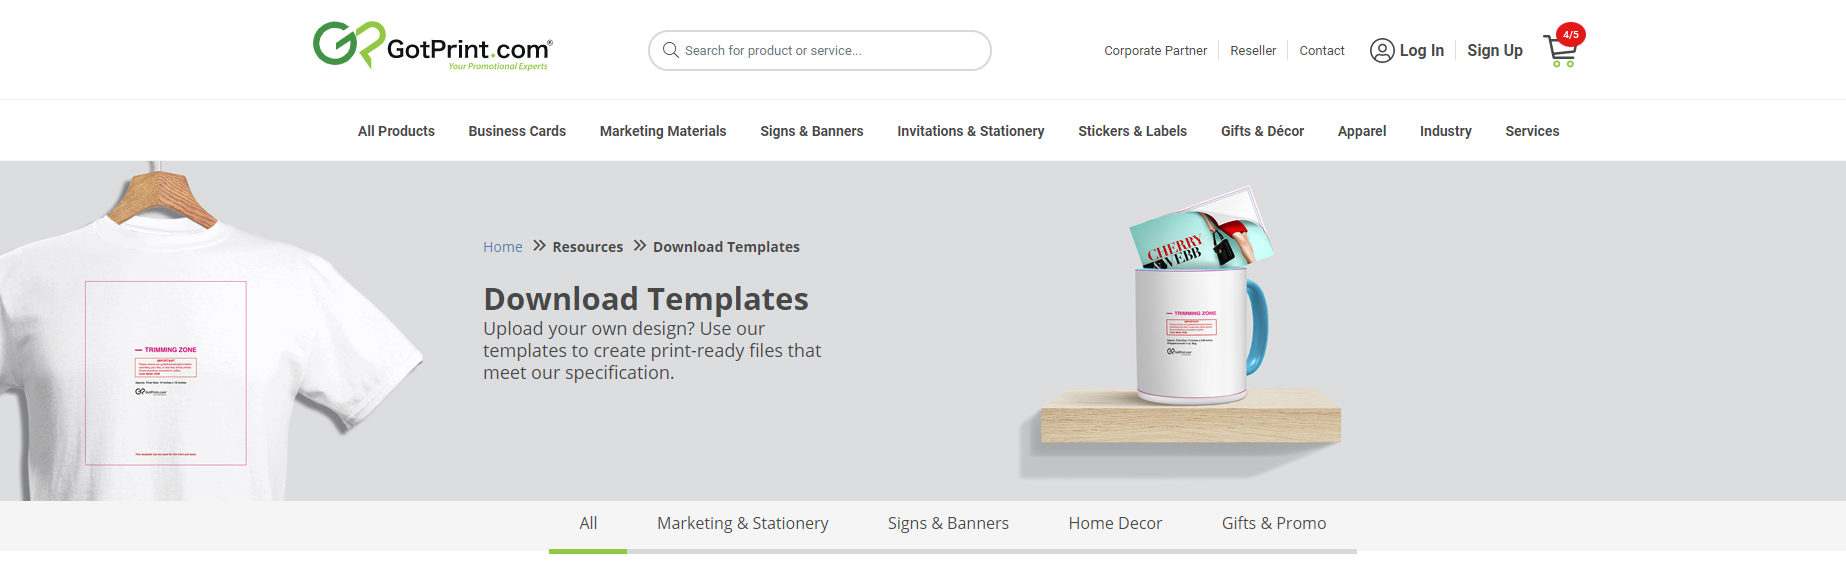
We provide templates for every single product we sell, so whether you’re using a professional design application like Photoshop or InDesign, or are using something more user-friendly like Canva, you’ll find that our templates are essential to creating your print-ready files.
2. After you’ve selected your product, make sure you download the template for the exact size and orientation.
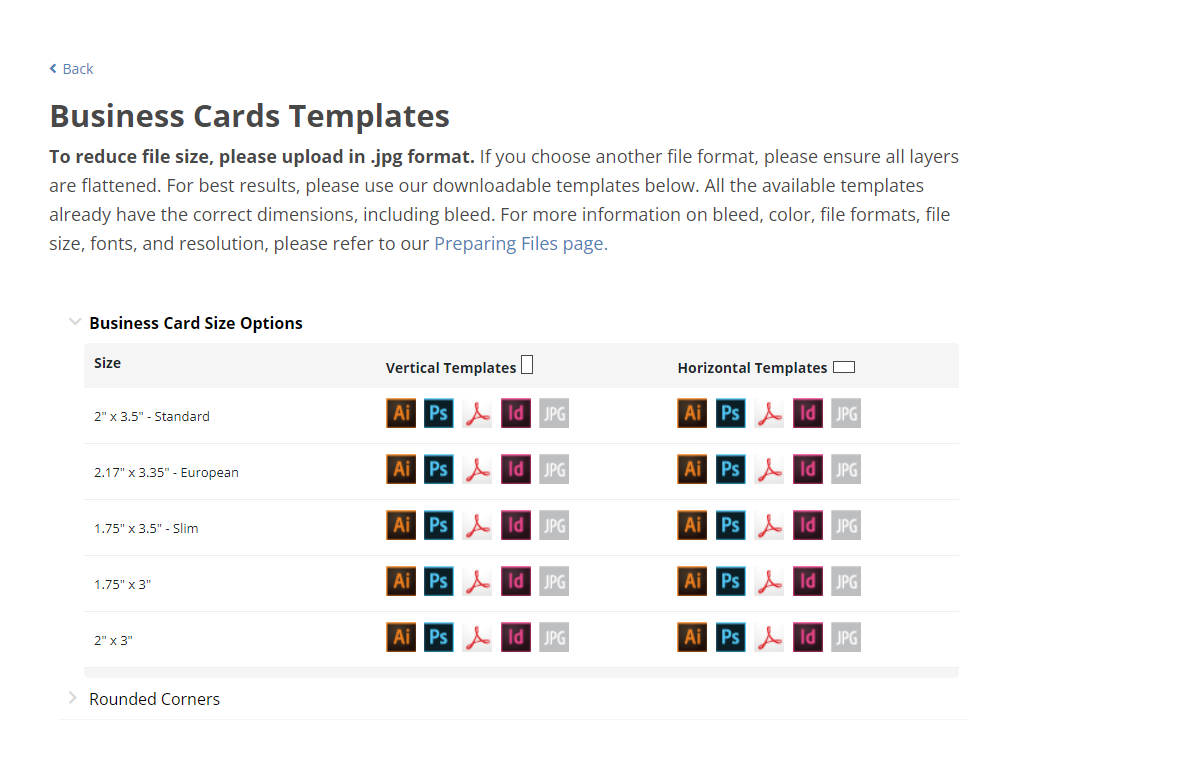
When using Canva, you’ll need to download the JPG version of the template. After downloading, open the JPG file and make note of the bleed zone. In the case of standard business cards, it’s 0.1 inches. You’ll need to make your Canva file the same size as the “Size with Bleed” found on the template. As you can see, the final size with bleed indicated on the horizontal template is 2.1 inches (H) x 3.6 inches (W).
3. Head to Canva.com to create a new design file.
On Canva.com, click “create a design” in the top right corner of the webpage, then select “Custom size” to input the exact size with bleed from the previous step. Make sure to change the sizing convention from pixels (px) to inches (in).
4. Upload that JPG Template file from our website to Canva as an image.
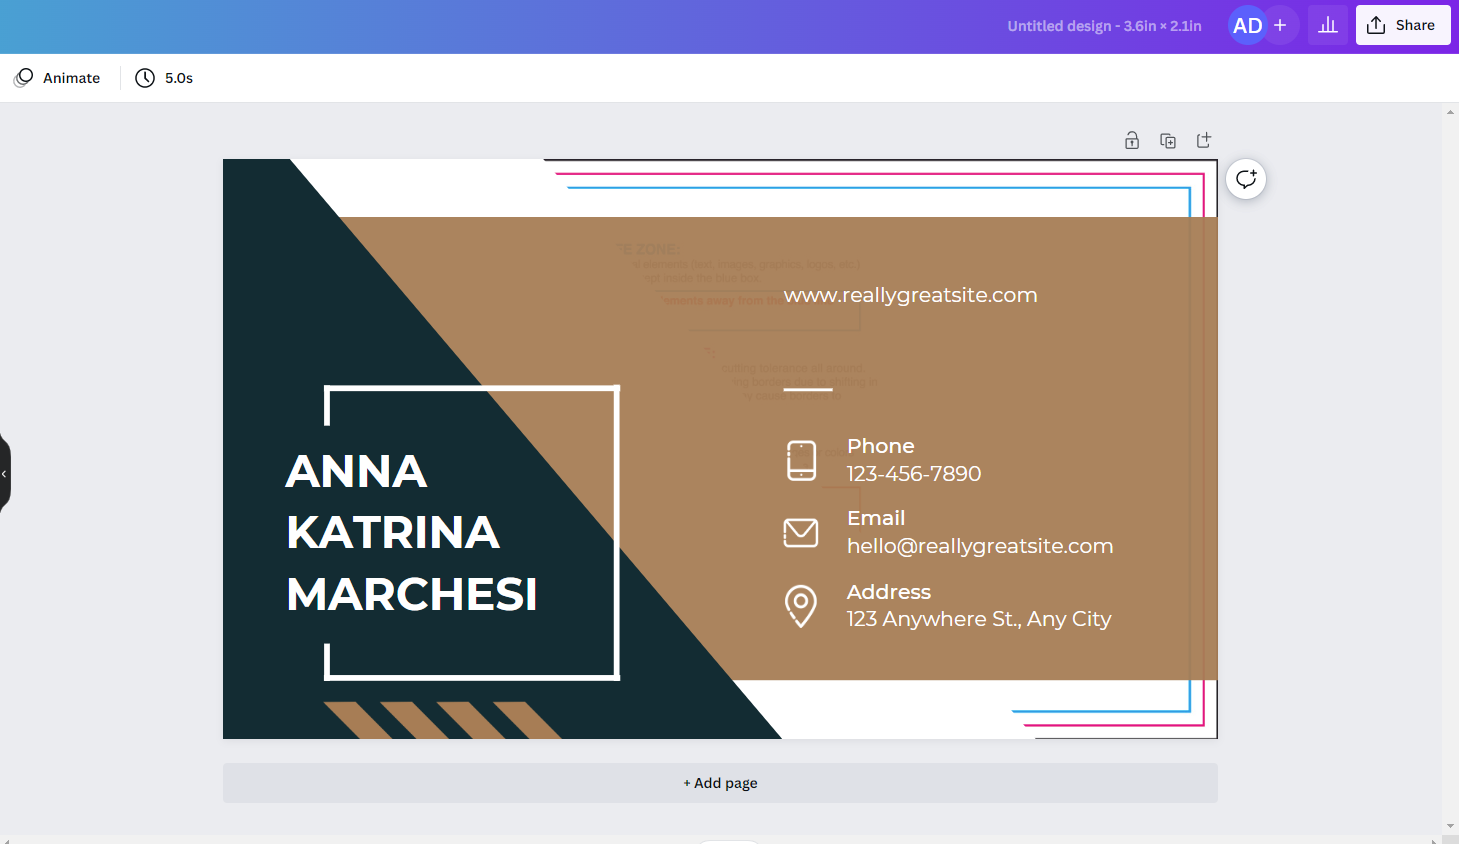
Doing this step will ensure that your print files will be within GotPrint’s printing guidelines. Once you’ve uploaded that template, you can drag it onto the file and either extend it to the size of the entire Canva file, or right-click and choose “set image as background” to see exactly where the safe zone, trim zone, and the bleed zone fall within your design.
5. Create your design as usual.
You can either do the previous step before you design your file or after. If you decide to do it after, you may have to adjust the placement and or sizing of some elements to ensure that they won’t get cut out of your prints.
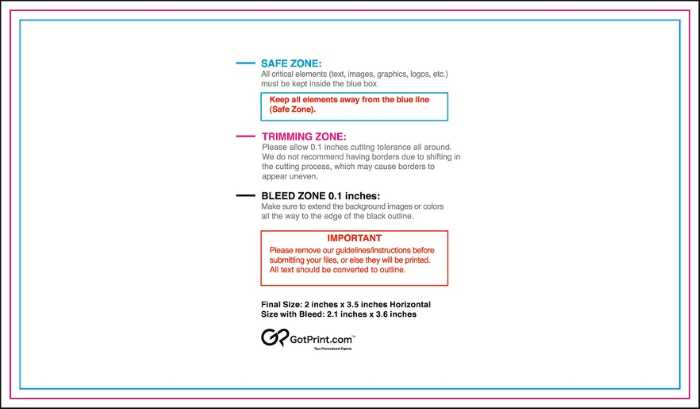
Some important things to note about the template lines:
Blue line = Safe zone: Everything within the box of the blue line will be printed.
Pink line = trim zone: The elements between the blue and pink lines are at high risk of being trimmed off in your final print.
Black line = bleed zone: Elements in this zone will definitely not be present in your final prints. We recommend you extend the background of your design to the bleed line to create a “buffer” for your designs.
6. Delete the template JPG from your Canva file.
Once you are satisfied with your design and the placement of all elements, right-click and detach the JPG template image from the background and remove it from the design file.
7. Export your finished file as a PDF or JPG and upload that file to the order form on GotPrint.com.

& that’s all! With these 7 easy steps, you’ll have your Canva files set up, printed, and ordered in almost no time at all.
—
If you need more assistance, check out our youtube tutorial below.